Settings
Network
Each network in Invariant is a series of snapshots of one of your networks. Using networks is how you will organize networks either by environment, location, status, or other factors.
Adding a new network
- Navigate to
Settingsin the top nav bar. - Scroll to the
Networkssection. - Click
Add Network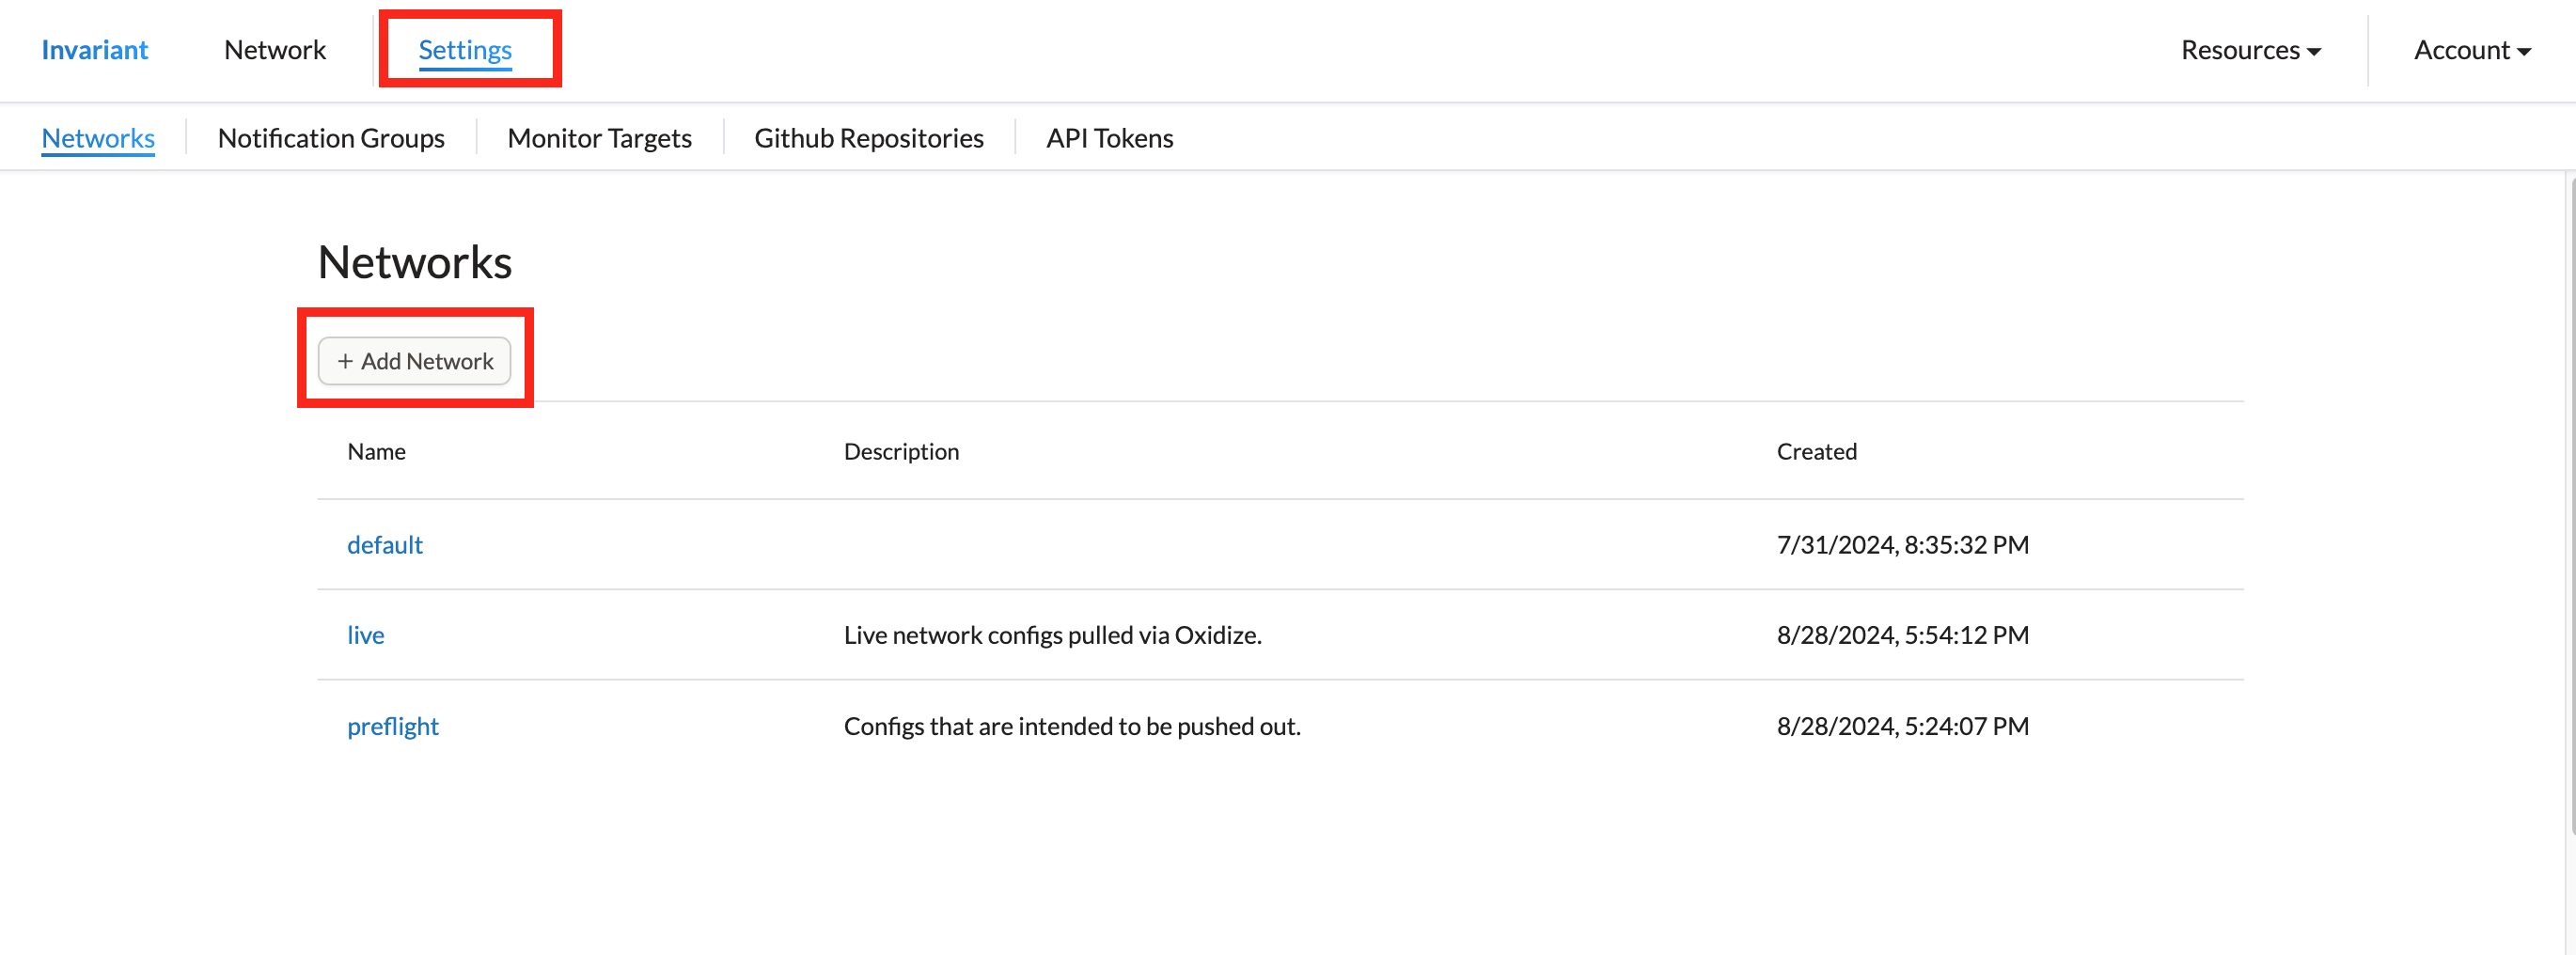
- Provide a network name and description.
- Click
Create Network.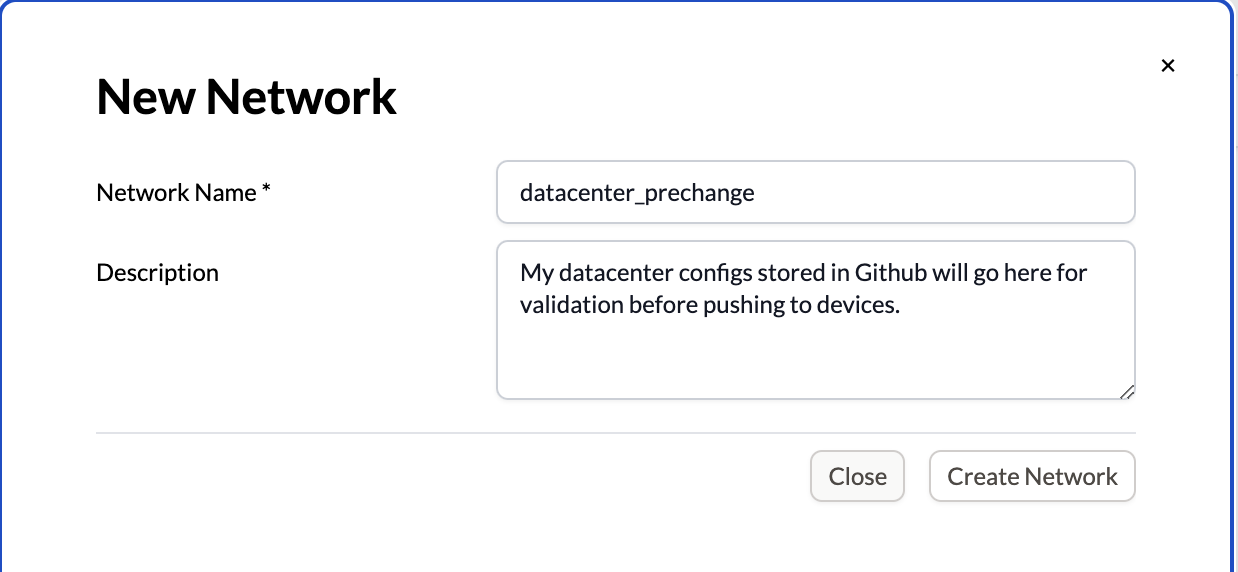
Notification groups
Notification Groups are how you set up email alerts when violations happen in networks. You create a group which contains 1 or more emails that are monitoring one or more networks. Your Notification Groups emails and networks can overlap between groups.
Adding a new notification group
- Navigate to
Settingsin the top nav bar. - Scroll to the
Notification Groupssection. - Click
Add Notification Group
- Fill in the notification group name.
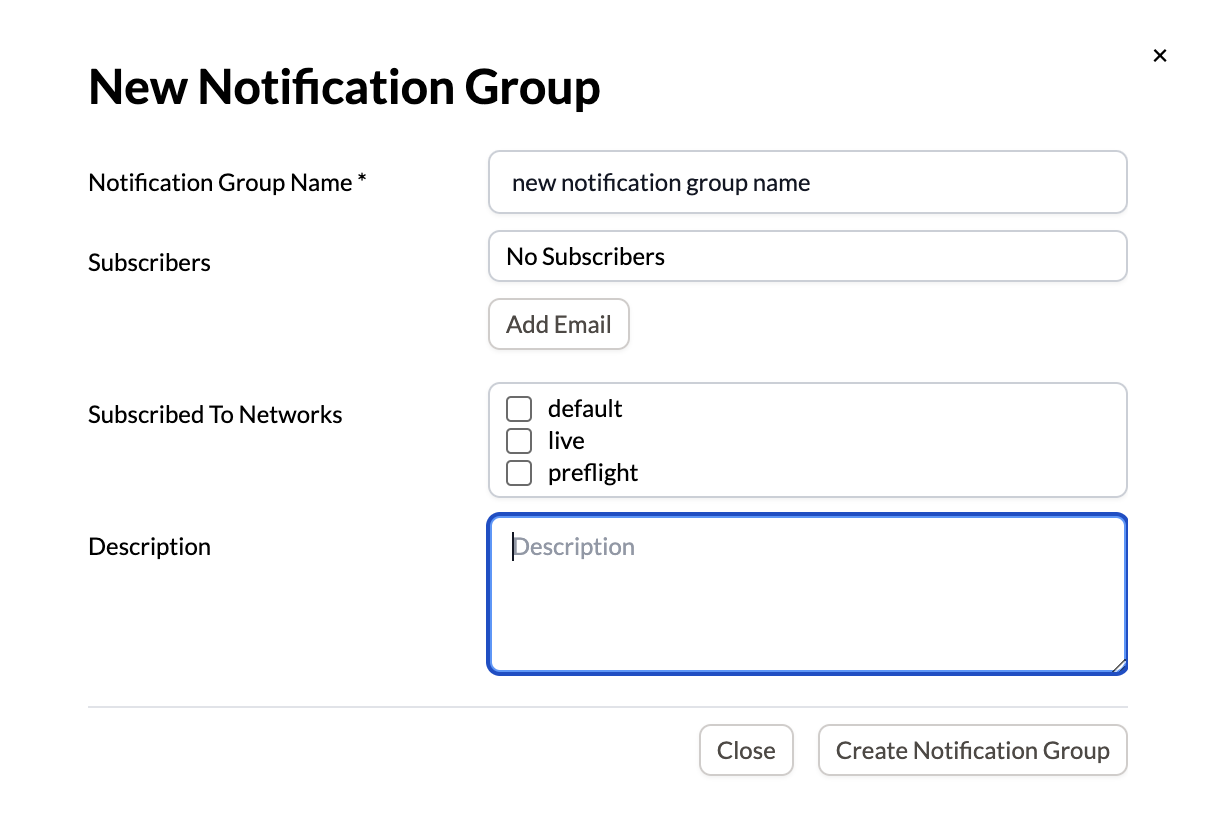
- Click
Add Email. - Fill in an email address.
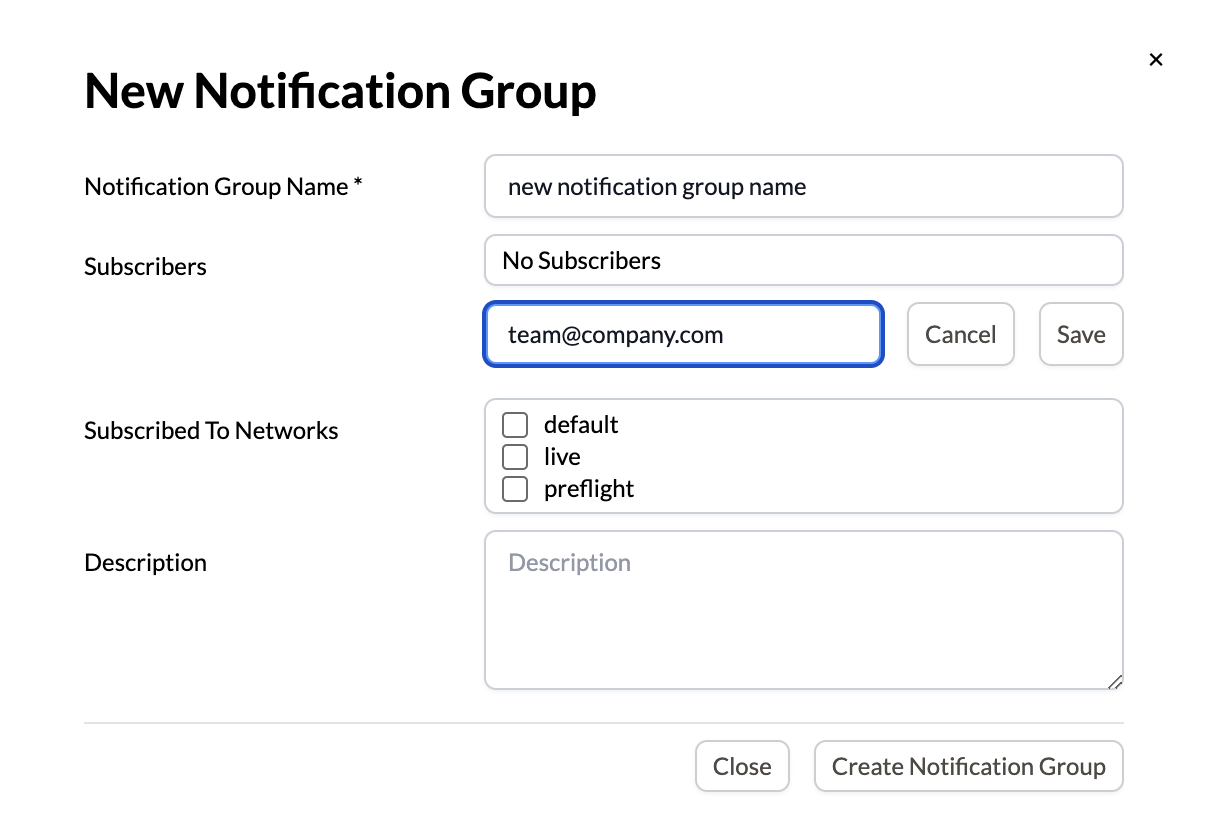
- Click
Save - Tick any network box you wish to subscribe the email to.
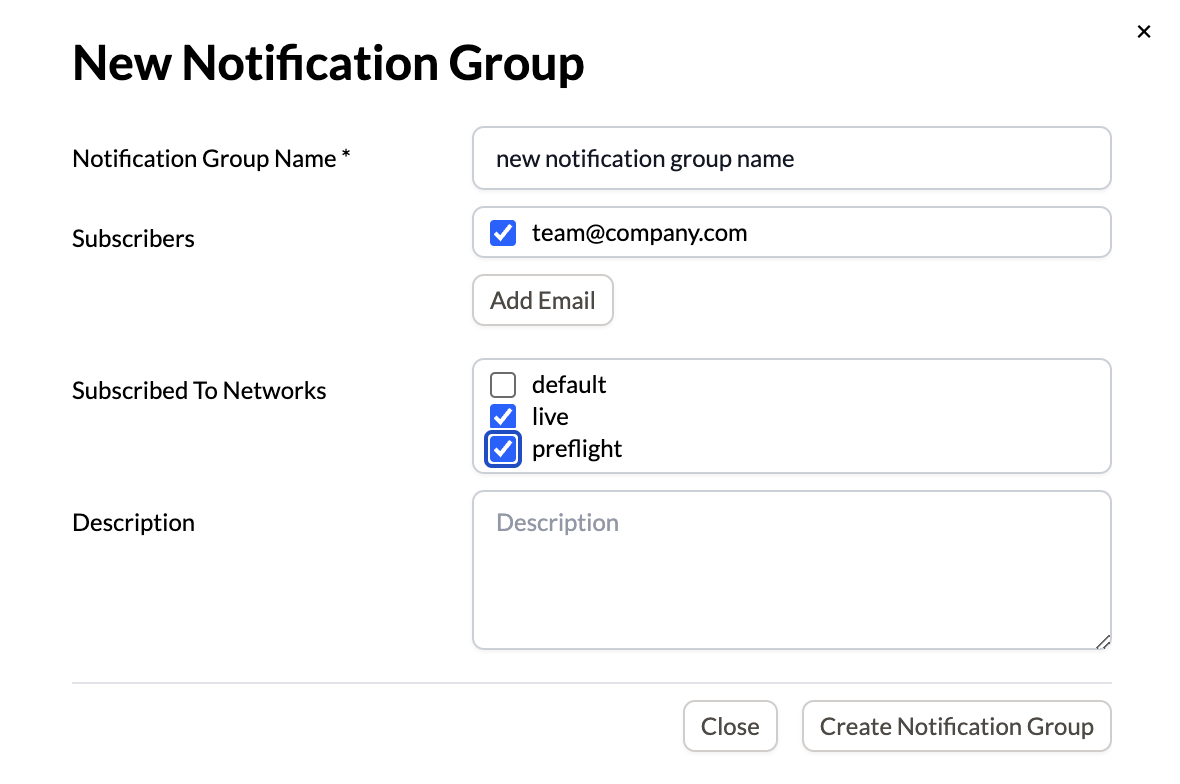
- Provide a description.
- Click
Create Notification Group
Github repositories
You can integrate Github with Invariant so that pushes to a snapshot repository are automatically validated by Invariant. This is done via our official Github application. Once you set a repository, you will need to set up a monitor target.
Adding a Github repository
- Navigate to
Settingsin the top nav bar. - Scroll to the
Github Repositoriessection.
- Click
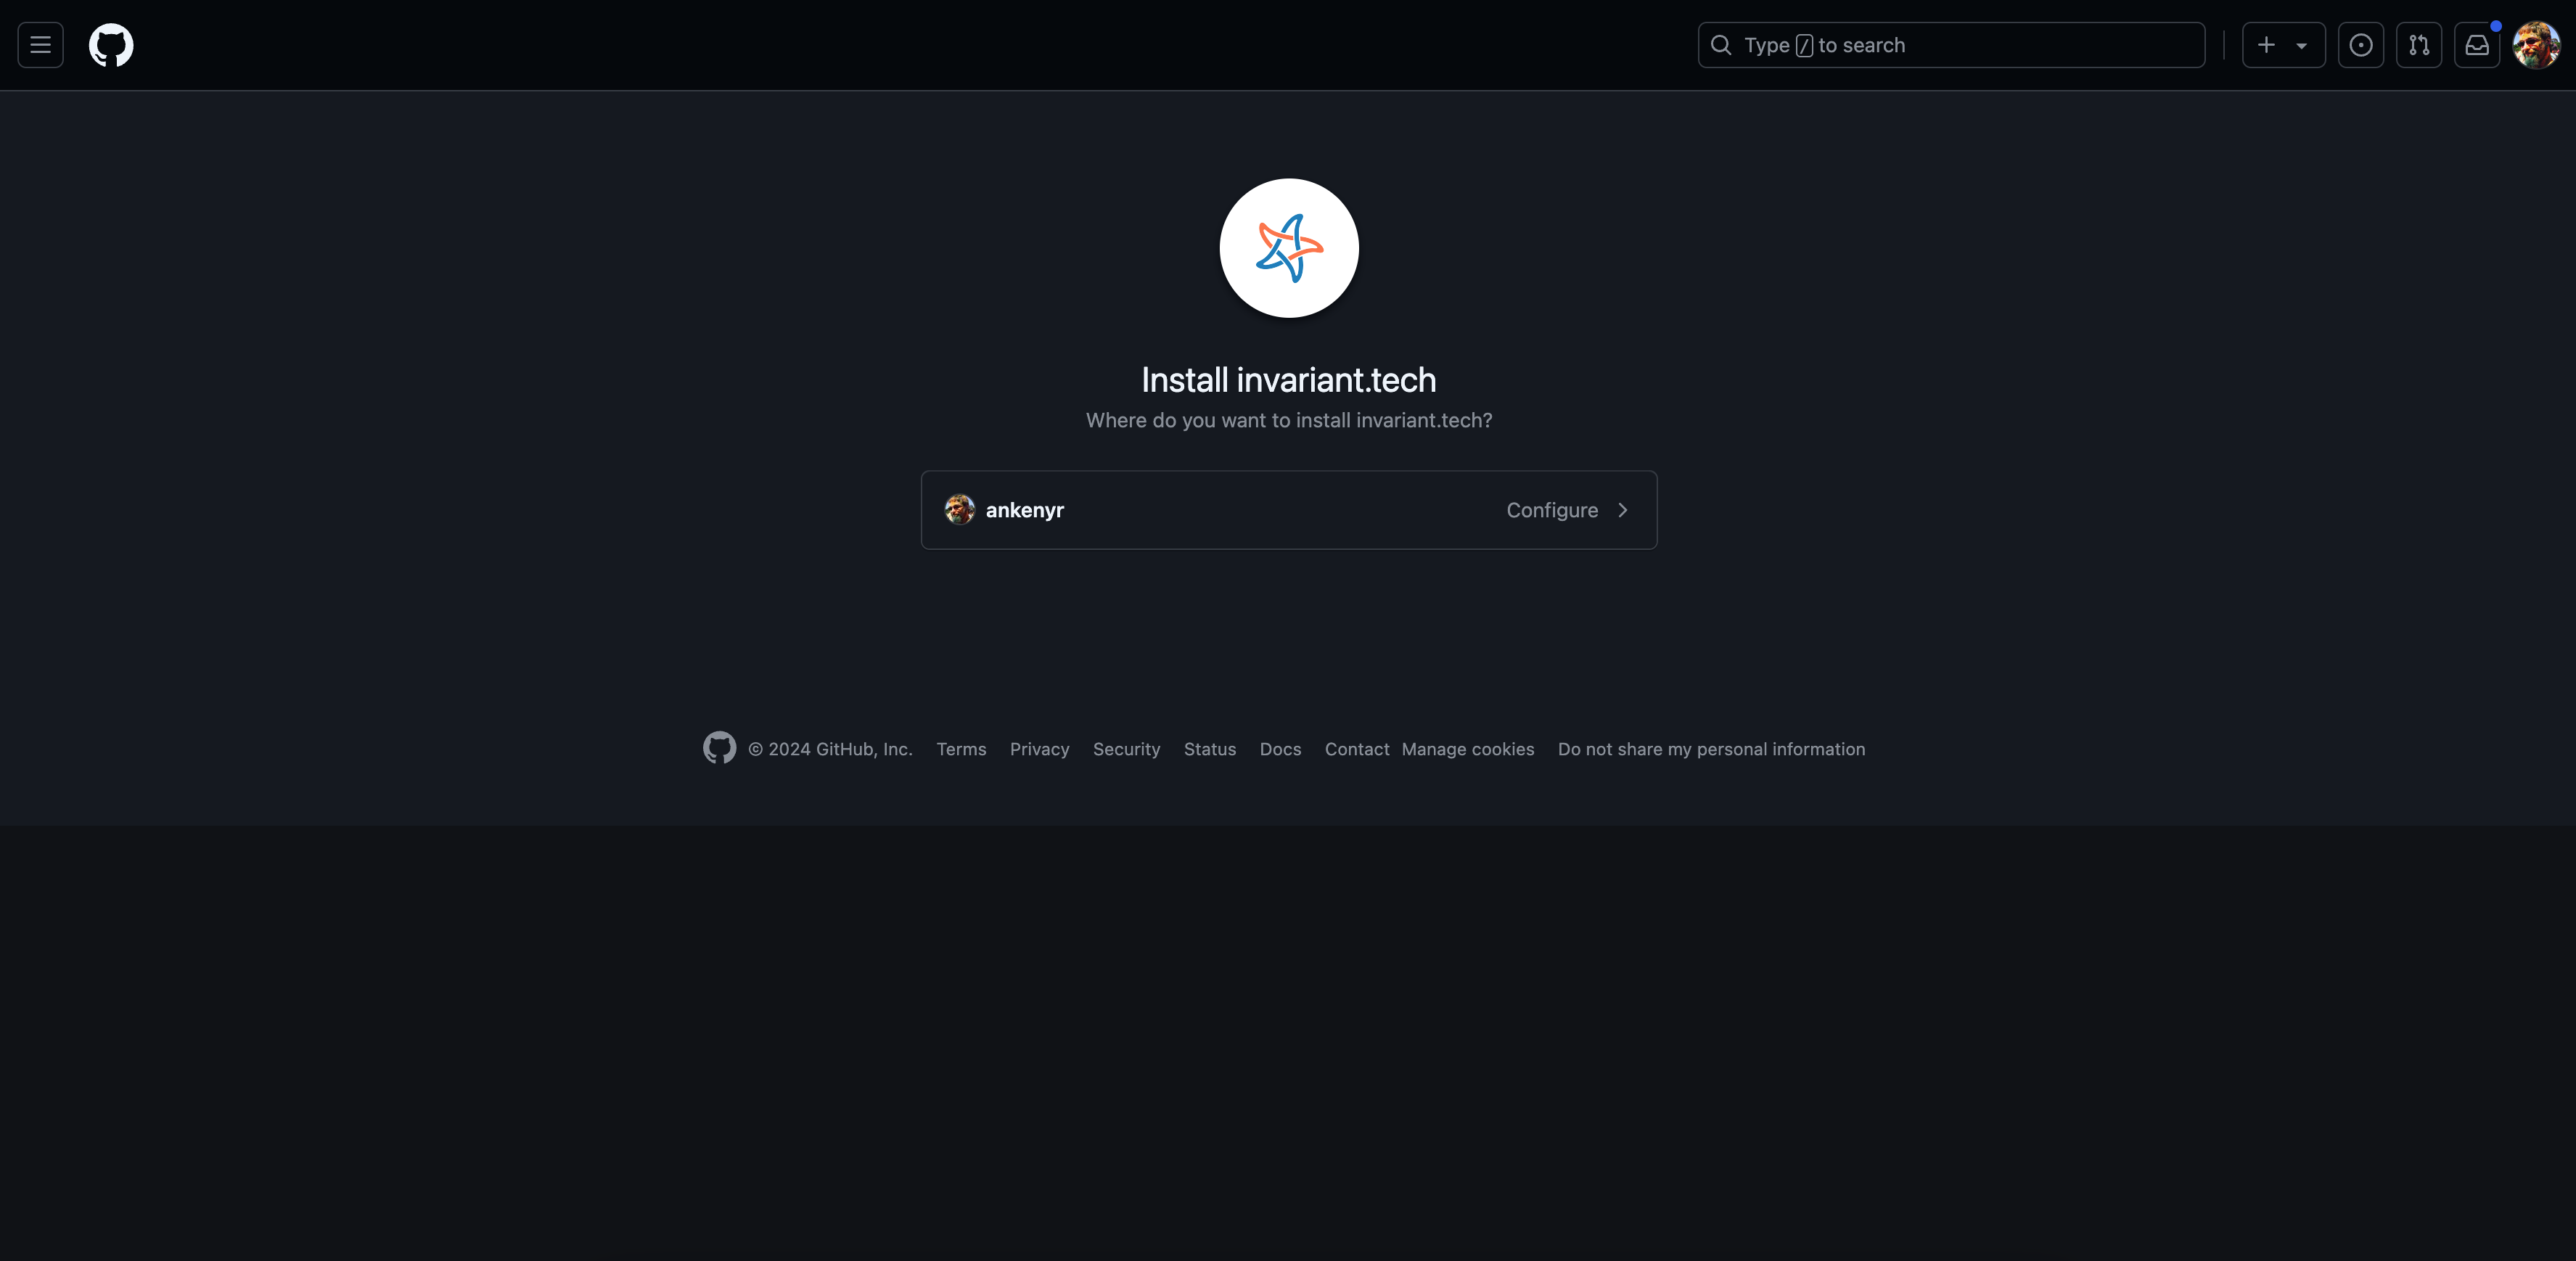
Connect a Github Repository.... This will bring you to Github's website where you may have to authenticate. - Click on the account you wish to install Invariant on.
- Find the
Repository accesssection and select the repository you wish to monitor.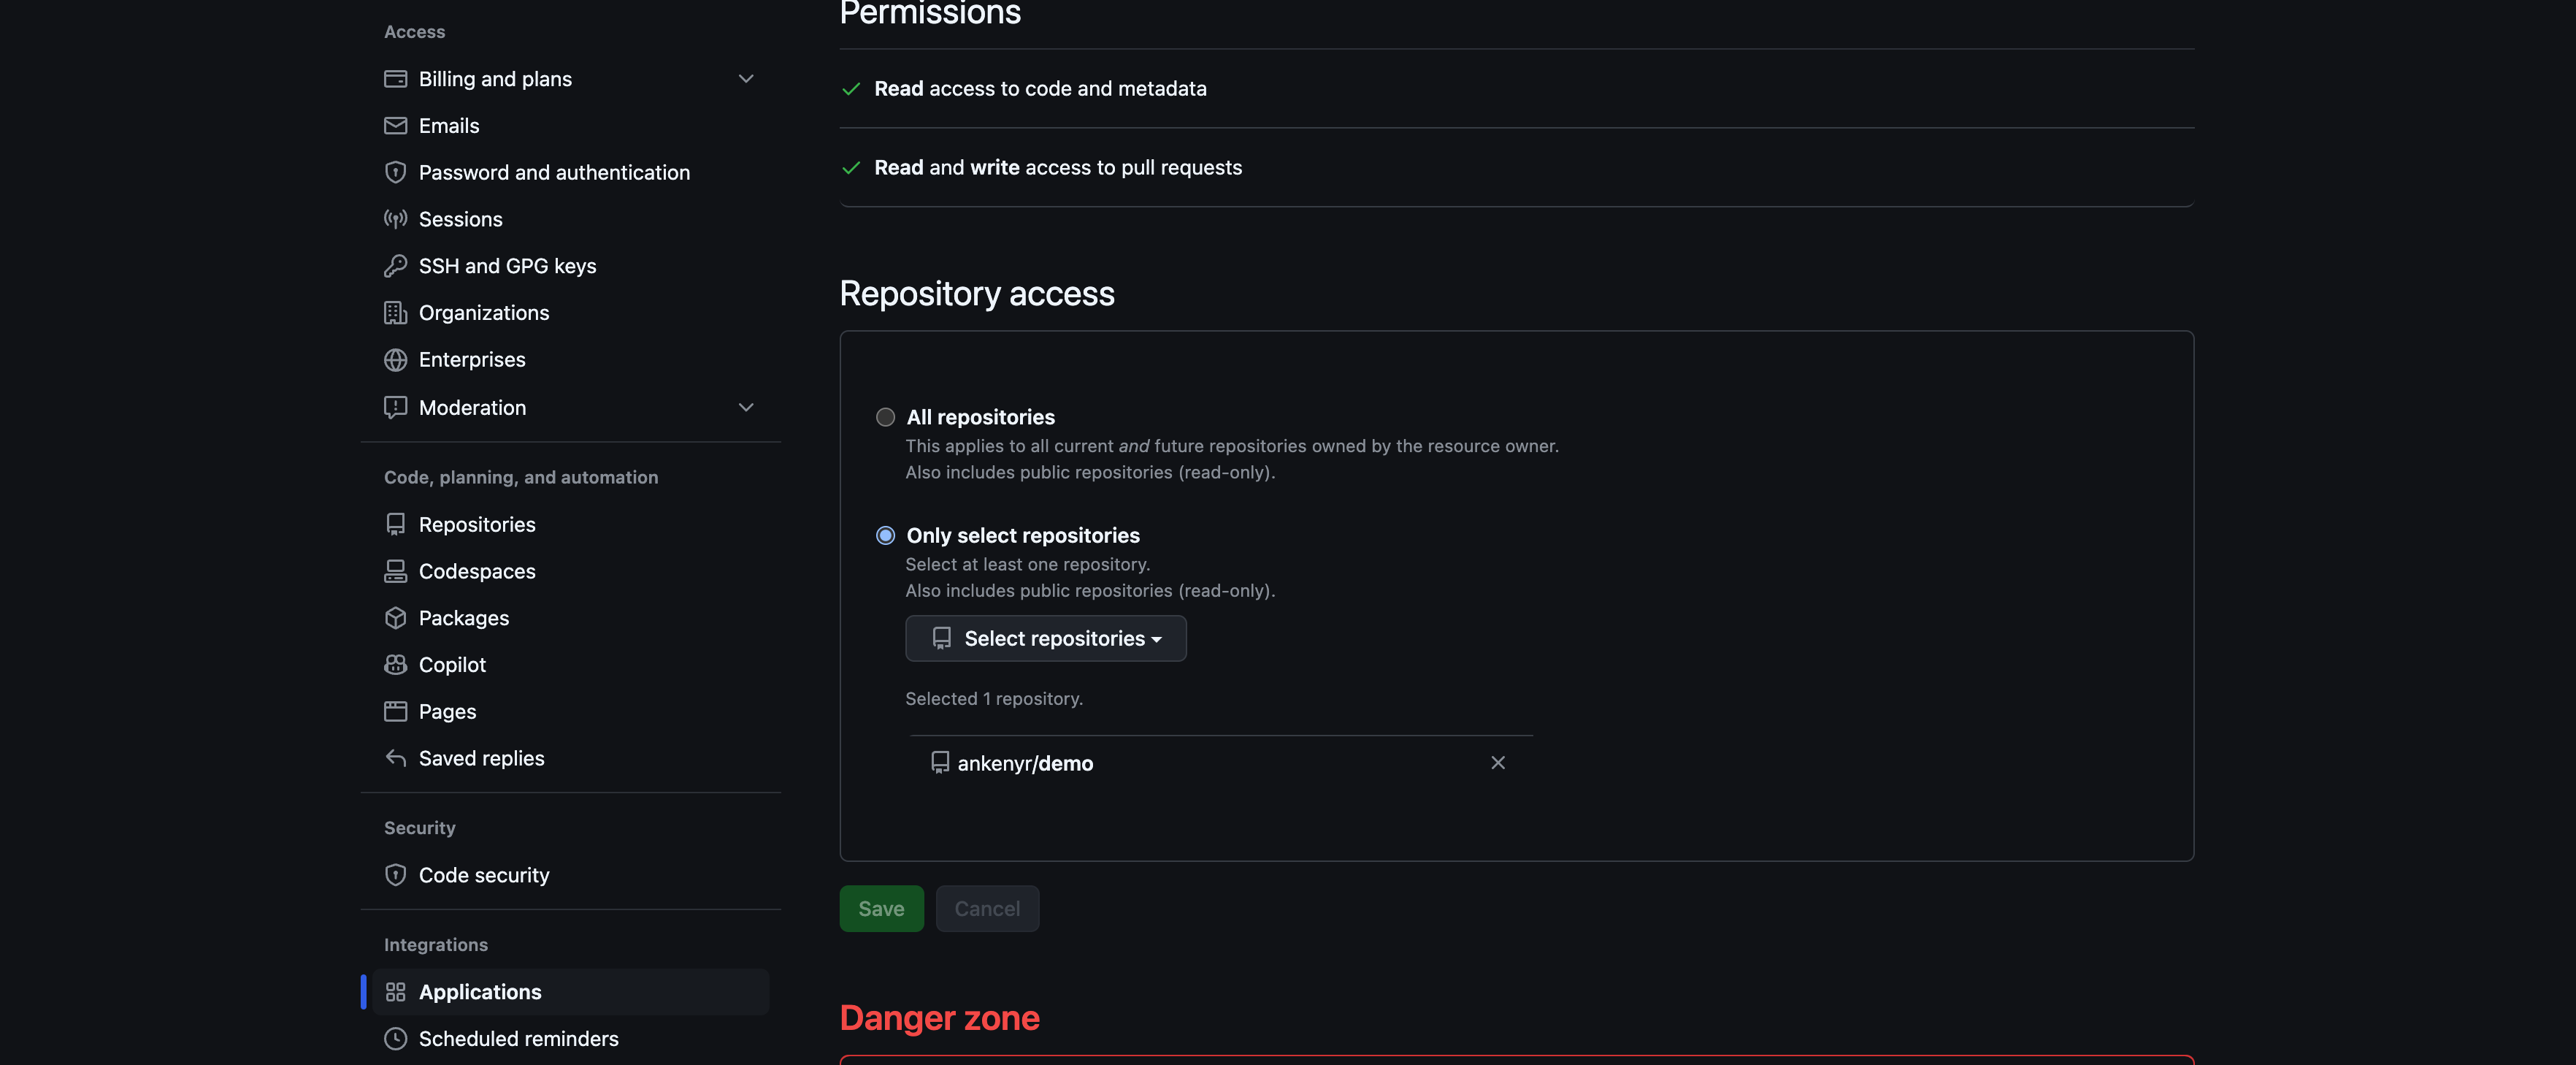
- Click
Save - Navigate back to Invariant's
Settingsand check theGithub Repositoriessection. It may take a minute for everything to update.
Monitor targets
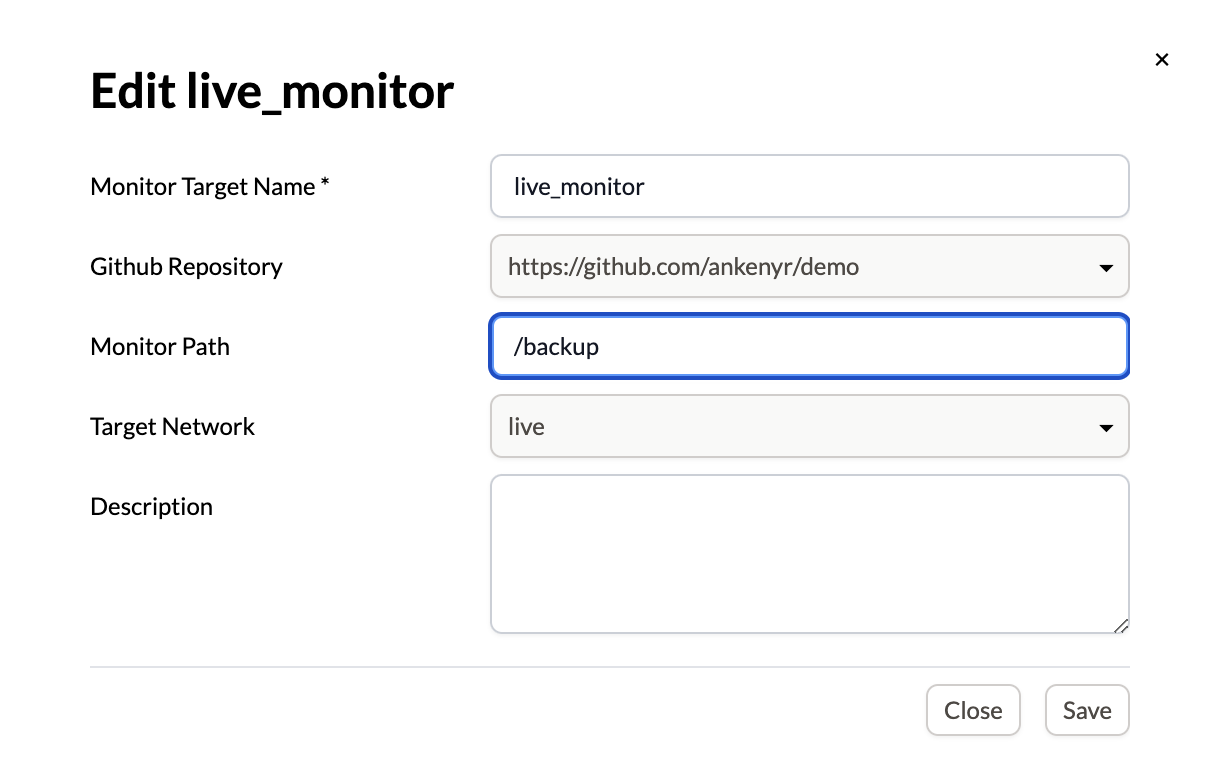
Monitor targets tell Invariant which repository and path should be monitored and used as the basis for a snapshot. You must have set up a Github Repository prior to using a monitoring target.
Adding a monitoring target
-
Navigate to
Settingsin the top nav bar. -
Scroll to the
Monitor Targetssection. -
Click
Add Monitor Target.
-
Fill in the
Monitor Target Name. -
Select a Github Repository from the drop down menu.
-
If the snapshot is not at the root of the repository, provide the path to the snapshot.
-
Select the Network that the snapshots will be uploaded to.
-
Provide a description of this monitor target.
API token
API keys are useful for creating automation via our client or SDK. Your API key will appear once, ensure you copy it to a secure place such as a secret store.
Adding a new API token
- Navigate to
Settingsin the top nav bar. - Scroll to the
API Tokenssection.
- Click
Create API Token - Provide a
Token NameandDescription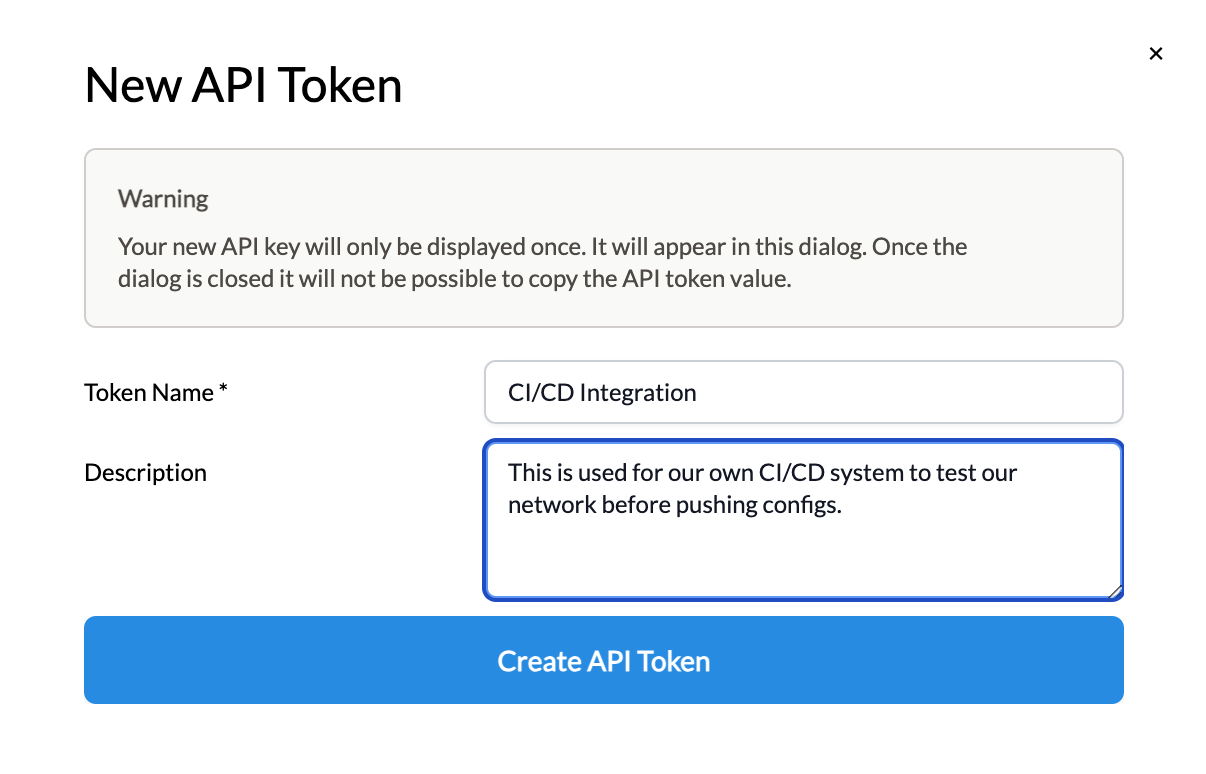
- Click
Create API Token - Copy the API Token to a secure location such as a secret store. You will not get another chance to copy the token once the box is closed.